This was originally posted on the ActiveRain blog site where profile pages are limited to be text only content. Let’s talk about a good workaround for the ActiveRain situation. Moreover, the coverage in this article about creating an interesting bio page applies also to your website About Me page as well.
When is the last time that you wanted to read a wall of words? Yeah, I didn’t think so.
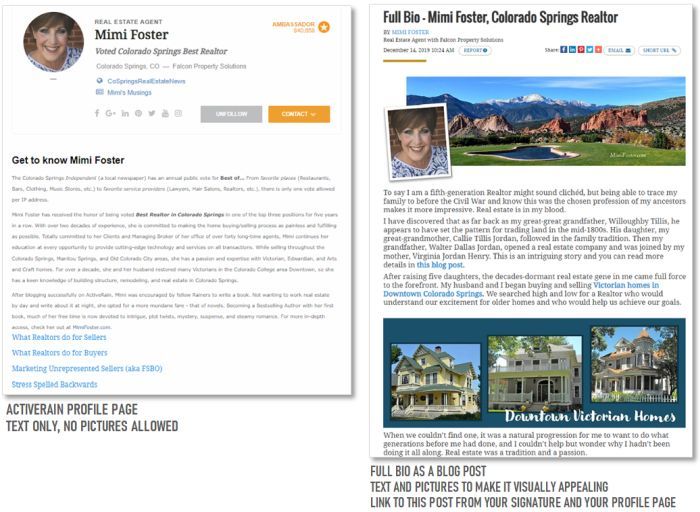
Consider creating a blog post that will let you create a full bio for others to come to know you. By creating a blog post, you can mix text and pictures so that you have a more visually appealing presentation. Compare the transformation with Mimi Foster in the above illustration. Her ActiveRain previous profile page is above left and her full bio post is above right. (Here is a link to Mimi’s new Full Bio post)
In order for this strategy to work, after creating the full bio post, you’ll need to link to it in order for it to be found in the future. The two primary places to link to it will be in your blog signature and a cross link from your profile page. This is important, so let’s look at these links more closely.
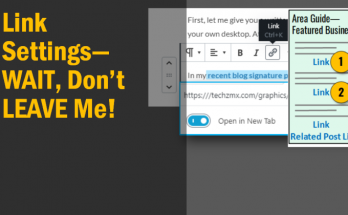
First, your Blog Signature is what automatically follows each of your blog posts. It gives some basic information about you, but there is limited space. So a link to “Read full bio…” in the signature is a perfect opportunity to lead traffic to the bio post that you have created.

The second primary place that you will want to link to your bio post is from your ActiveRain Profile page. People are funneled here for example via clicking on your portrait or name on comments that you make on other people’s posts. Also, each of us have a “My Profile” button on the top right of each page of our blog posts. So people will land on our profile page, what we want to do once they get there, is detour them to the page we actually want them to be on.
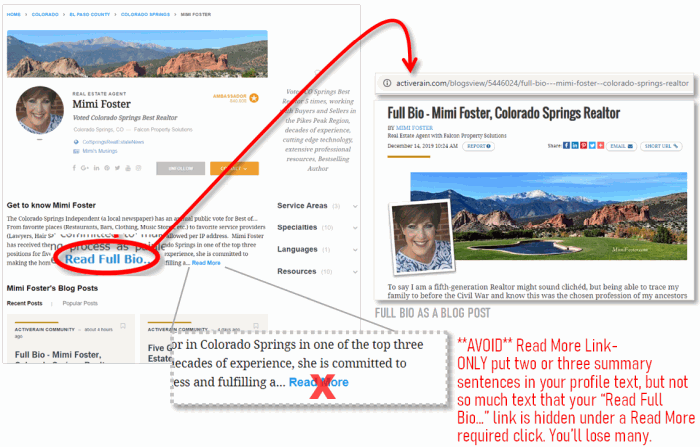
If we put just a few overview sentences about us here, we can then follow that text with a “Read full bio…” link to direct them to the page we actually want them to be on. Be careful not to put too much text in your profile because then the system will automatically create a “Read More” link. If that happens, it will require that the reader click the “read more” link to see the link that we WANT them to see. Many will skip over that extra click and miss the opportunity.
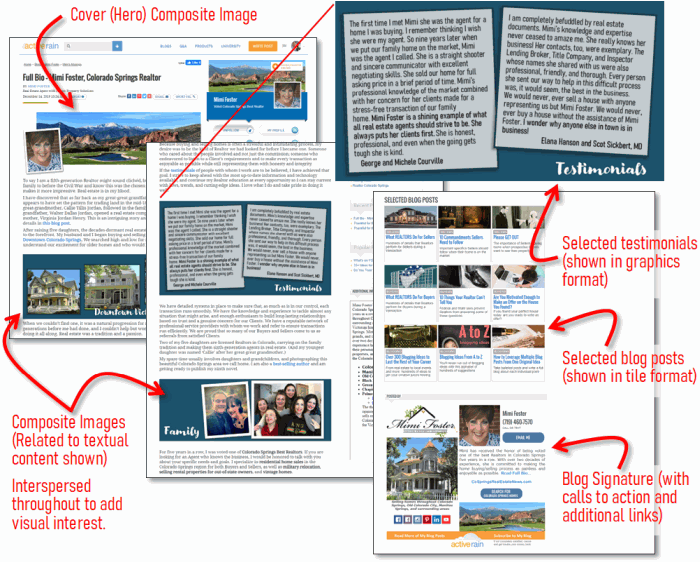
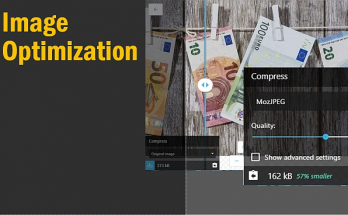
You’ll see we used composite graphics throughout the post. This raises the bar on the quality of your visual presentation. I’ve got you covered though, check out my Blog Signature (part 2) post where I dive into this topic more specifically. The images aren’t hard to make, but it does take a little practice and it is worth the effort!
The key to a good bio is balance. Nobody wants to read on and on about how many certifications you have. Narrate more about what you can do for them and why you are qualified by experience. A few specifics in the narrative will show that you know what you are talking about and that you are not just copy/pasting the same generic text that every agent website has. Also, testimonials are good to show but not three pages full! As you can see, we picked out two testimonials and highlighted these.
While this is a professional services bio, it can be very beneficial to add just a touch about you and your personal interests — a little bit shows a depth of character and informs us about the PERSON and PERSONALITY behind the name. This is opportunity to humanize and connect at an alternate level.
The final section that we added to Mimi’s bio was for highlighting Selected Blog Posts. This is an opportunity for you previous blogging work to shine. This is another chance to make an impression by not only saying that you know what you are talking about, but to show it! (note: I used some HTML/CSS styling to make this section appear as visual tiles. That’s an entirely different, and very advanced, so far unwritten, tutorial. You can however make a list your best blog posts and hyperlink them to the articles.)
Finally at the end is the blog signature that puts some nice finishing touches on the page with a link to your website, how to contact you by phone or email, social media links to connect to you and and a few other select calls to action. ActiveRain uses blog signatures at the end of each post. To learn more about blog signatures, go here.