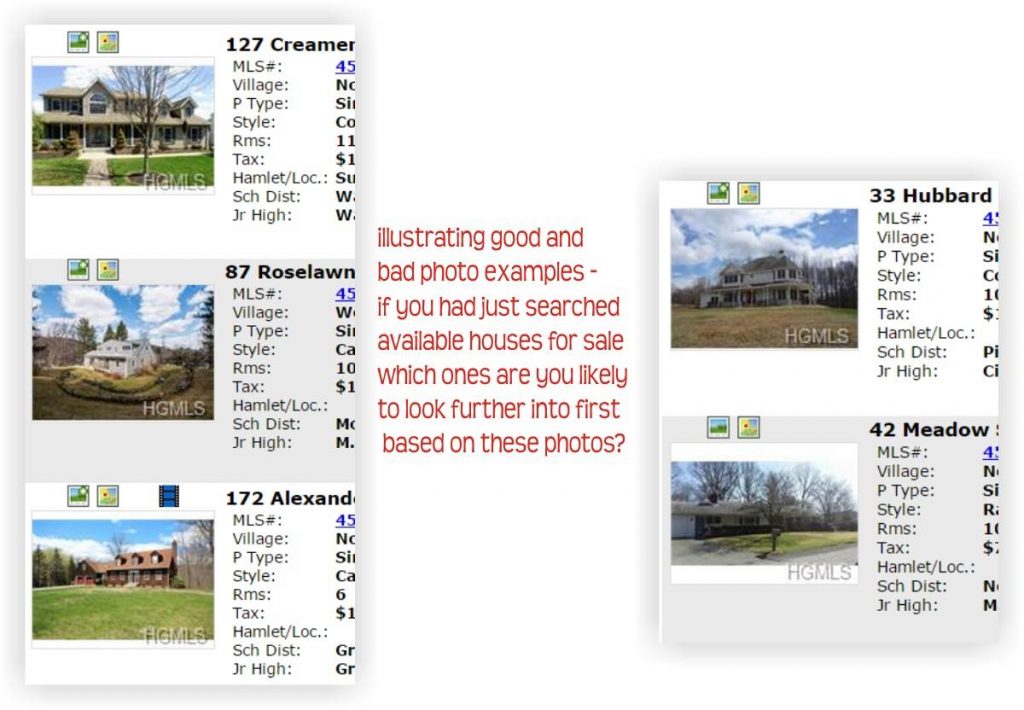
If you are a listing agent, quality photography of the home that you are marketing to sell is critical. Imagine the couple that is ready to buy a home. They are browsing their choices online. Consider if there is an abundance of choices in their price range and the area that they are looking into. If your listing’s photos are drab and lackluster, your potential audience may pass over rather quickly to the other homes. Are you missing opportunities?
Many agents opt for professional photography because of the special importance that quality real estate photos have. The first steps of home shopping happens online these days. So having the best possible photos is a wise investment and hiring a professional will certainly produce high quality marketing photos.
As you browse the MLS however, excellent photos may appear to be the exception and not the rule for many agents. In fact, I’m amazed at the terrible quality photos that agents often present. There is a middle ground in real estate photography that is also acceptible. It is possible to do your own photos AND have a quality presentation. There are so many factors involved to raise the bar and have your photos equal to the role that they need to play. Having a good camera is the starting point. Knowing how to use the settings on your camera is important (sometimes it helps to override the ‘auto’ setting) and using a tripod (gasp!) at times for longer exposure shots. Choosing the best time of day can help tremendously with exterior shots. Learning how to compose a shot also is essential (no we are not selling the bed or the couch here, we are selling the house!) There is one final element that is often overlooked that also can help kick it up a notch to make your photos stand out and that is in regards to photo editing or in other words a little post production processing.
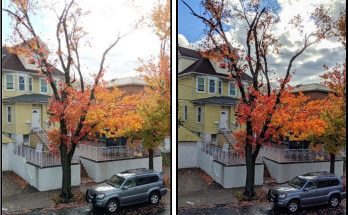
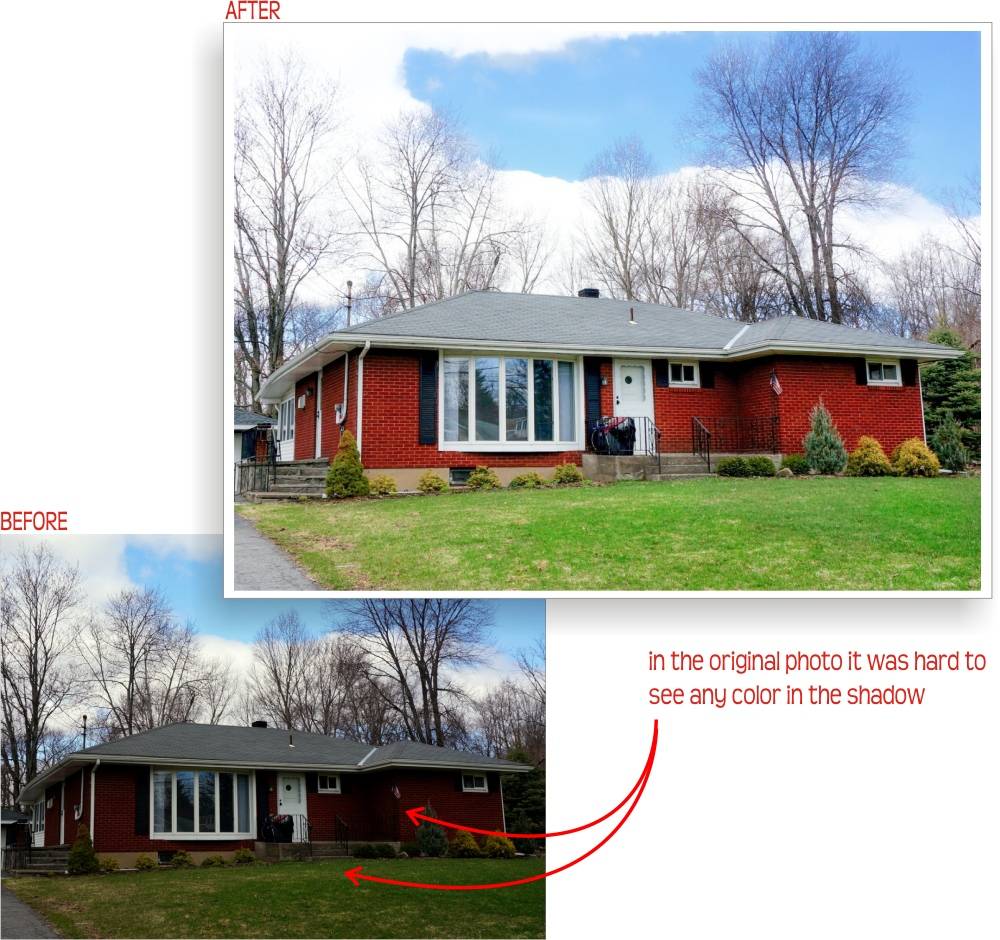
Most shots can benefit from a little photo editing to pull out the hidden details. Your camera will choose an exposure for you that it thinks is the best for the shot you are taking. Often when there is a large dynamic range of brights and darks, this proves to create disappointing photos. Notice the exterior front shot of the listing below. In the “Before” photo, much of the detail is lost in shadowed areas. In the “After” shot, you can see how I used the various processing tools to bring out the hidden tones and detail. Now if this were the cover photo on an MLS search, which version do you think has the higher probablility of a click-through?
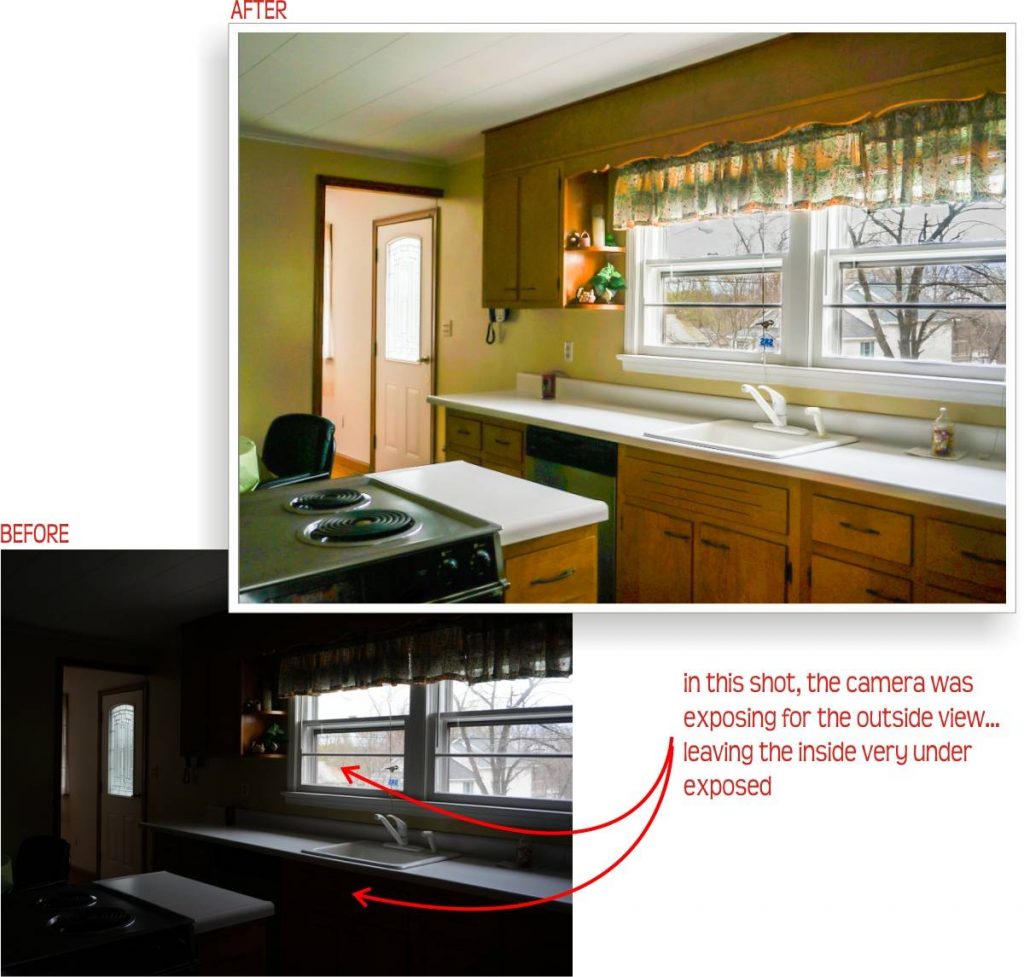
In the next example, let’s take a look at an interior shot that I was able to rescue. The camera was using an exposure setting that was based on what what was outside the window instead of inside the room. The result was a completely underexposed interior shot. Not all interior shots like this one can be rescued, but this one happily had much of the tone details still intact. They were just hidden in the shadows and with the twist of an adjustment slider or two or three, they made their appearance!
One of the things that helps in your post-production editing session is learning how to read a histogram. This is a graphical chart that represents the various brightness and darkness levels that are found in your photo. In an advanced photo editor’s toolbox, there are ways not only to adjust the global exposure, but to selectively move around regions of exposure. For instance, you may very dramatically slide the exposure level but pinpointing only the shadowy areas. If you adjusted the whole photo as dramatically in exposure, the already bright areas would get blown out and lose their detail.
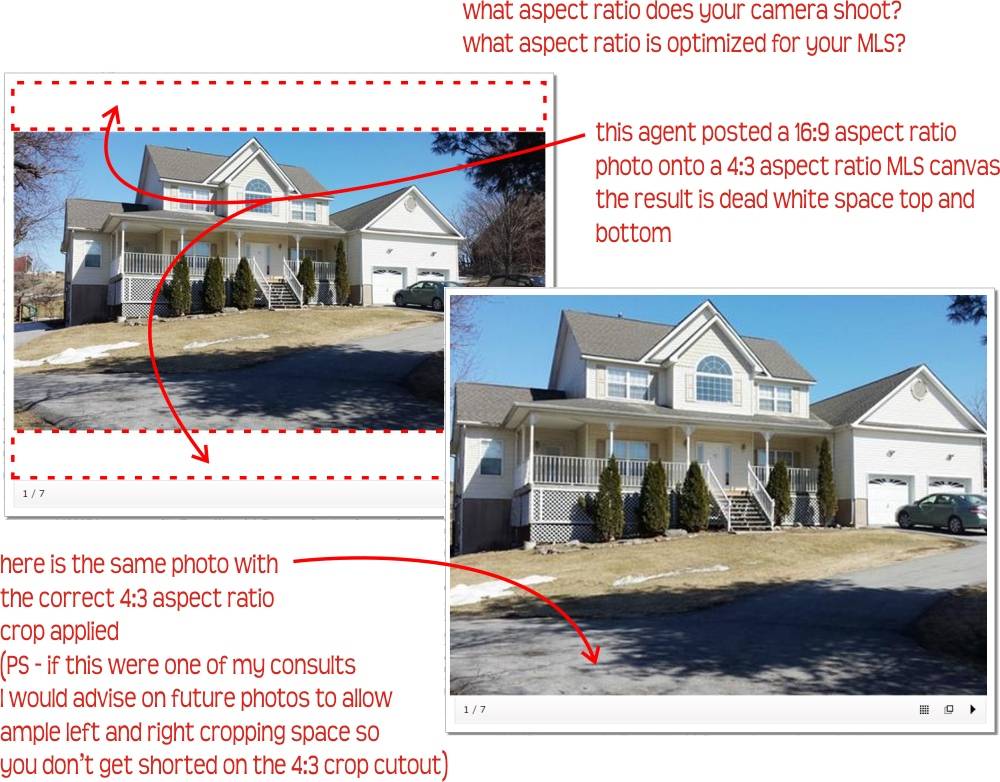
Another MLS-preparation task that can be handled in post-production is to crop to the aspect ratio that is optimized for the MLS. A common aspect ratio for real estate photos online is the 4:3 ratio. However, not all cameras (and especially higher value cameras like to shoot in 3:2 ratio; or perhaps your camera shoots HD format which is 16:9 ratio) If your camera does not match the MLS canvas and you don’t adjust the crop, you will get dead space white areas (sometimes shown as black bars/called letterboxing. The color of black or white depends on the how the presentation site is set up)
These are the typical kinds of edits that you will want to be aware of when you are preparing photos for your listings. I’ll be posting more about techniques to do this, so stay tuned to this blog. This is also one of the services that I provide for others. If you are interested to try this out, please contact me.