To make a blog post more appealing, you should use images for eye appeal. Often the images we would like to use are in the form of photographs. I see very often (with even experienced bloggers) a mistake with images because of not understanding proper sizing of a photo.
Let’s go through an exercise of preparing a photo for a blog post so you can learn proper technique.
When you are blogging, you have a main content area where your text will go. On web pages, our unit of measure is the pixel. Most blogs have a content area ranging between 600 and 800 pixels. It depends on the theme you are using as to how much width you have available to you. On ActiveRain, the current theme has a content area that is 700 pixels wide.
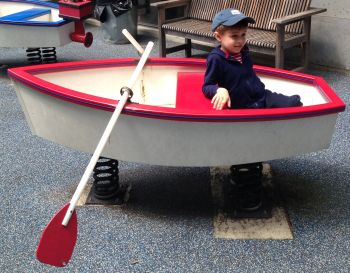
The photo of my son in the play rowboat on the right has been sized to 350 pixels wide so that the text can flow around the left side of the image. However I did not simply upload the original photo to the blog page. This photo was taken on my wife’s iPhone. The iPhone uses an 8 Megapixel (MP) setting. In terms of our page ruler, that is a problem. Consider that 8MP photo from the iPhone has the pixel dimensions of 3264 x 2448 and a file size of 3.8 Megabytes (MB).
We just mentioned how I needed the photo to be placed with a 350 pixel width. The mistake that I often see is that people will upload the full resolution image and then tell the blog page to “show it smaller”. Have you ever been on a blog page and notice that the images take a few seconds each to load? You will usually see a “waterfall effect” where the photo gradually reveals itself in a top to bottom sweep. This is the clue that the blogger did not upload a blog-optimized size photo but instead just uploaded the original photo. (It takes a little time for those Megabytes to transmit to you.)
This is bad because we want our blog pages to load in a snap! It is a poor user experience to have it otherwise. Google also in its page ranking algorithm looks at page load times. Can you perceive a few negative points here on your page score?
So what you need to know as a blogger is, “how do I resize a photo BEFORE I upload it?”
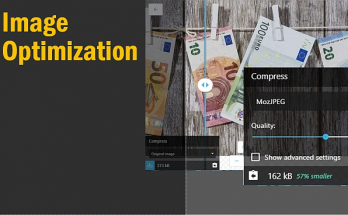
You need the assistance of a photo app to create a smaller size copy of your photo. If you want to use a desktop app, you can use the basic choices that most computers have which is the Paint app on Windows or the iPhoto app on a Mac. Another great option is to use one of the web based photo apps that are available for free. My go to web app is iPiccy.com (there are other similar web apps like Pixlr, Picmonkey, Ribbet, etc but I really like the ease of use of iPiccy and the range of editing tools they give)
Once you have your photo opened in iPiccy, notice the different editing panels on the left side of the window. Find the “Resize Image” panel. You’ll see your original high resolution number that you want to type over it with your lower number. 350 pixels is a good width that will take up approximately half of the text area width (for when you want to wrap text around a photo like above). If you are doing a photo to match the entire width of your blog text area, you would choose 700 for ActiveRain (or similar depending on your actual blog page theme if on WordPress or elsewhere).
Afterward, you will want to save the image from the website to your local drive.
I often will name the file with the size number as a reminder that this is the version of the file that I want to upload to the blog post.
So in this case, I called it “rowboat-350.jpg”
In the end my image was 38 Kilobytes (KB) or 0.038MB or 1% of the 3.8 MB that the original image was.
This means a huge difference in page load times!
Now you know how to properly resize a web-optimized photo for your blog!