Having an image in your blog post makes it interesting for the reader. Of course having valuable text content is the first priority! However the synergy of the text and the graphics that you use is not to be overlooked for the ingredients of an A+ post.
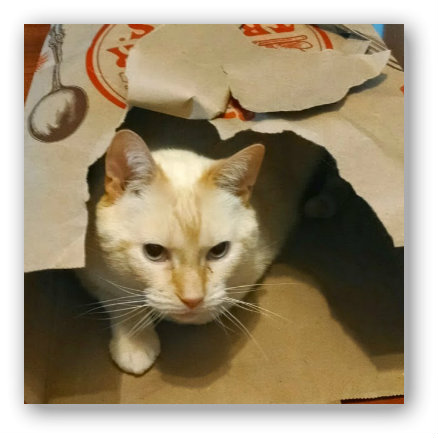
Oftentimes, bloggers will size an image so that it is not too wide and this allows you to have the text alongside the photo. That is what I am doing here with the photo of my cat Buddy. He’s having a great time hiding in a shopping bag over there.
Do you see something different about the photo though? Look around the edges. It has the appearance as if it is floating a little above the page. The drop shadow effect is what makes this possible.
The drop shadow is an optional thing that you can do if you choose with your blog images. If you want to give it try it takes just a few extra minutes.
Here’s one way that you can do it.
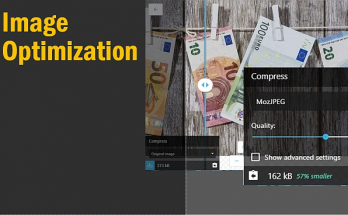
Go to the iPiccy.com website and upload your photo. First, resize your photo so that it is blog optimized size. (see this post for more info on resizing images). Next, click on the “Frames” tab near the top of the iPiccy editing area. On the left sidebar, scroll down until you see drop shadow.
You’ll notice that you have a few different sliders in the drop shadow panel that you can fine tune how you want the shadow to appear. “Distance” will move the shadow farther away. “Size” will control how big the shadow is. “Angle” controls which direction. “Fade” gives it a more feathered or hard look to your choosing. The key tip I can offer is not to exaggerate the effect. It should be subtle if you use it. It is just a little something to add a pop but not to become the main focus.
Finally, save your image from the web down to your local drive and then you will be able to upload it into your blog post.